Pages

Monday, October 26, 2015

Products that I used for a DIY brunette to blonde

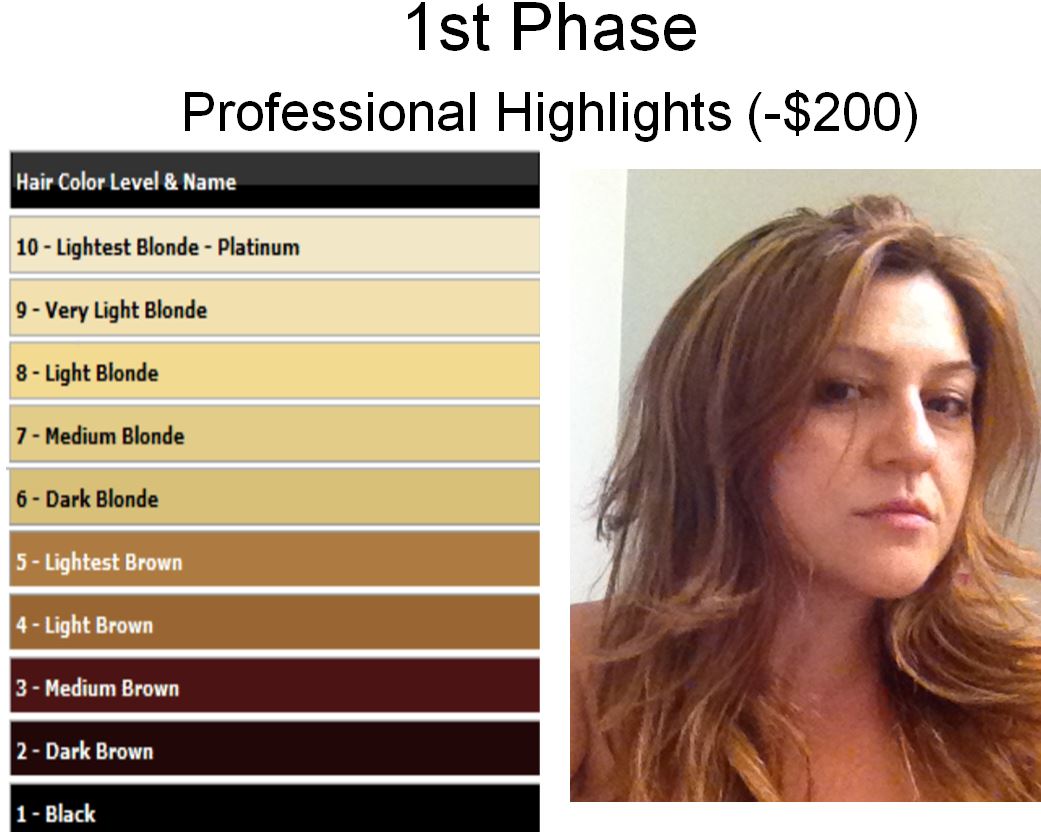
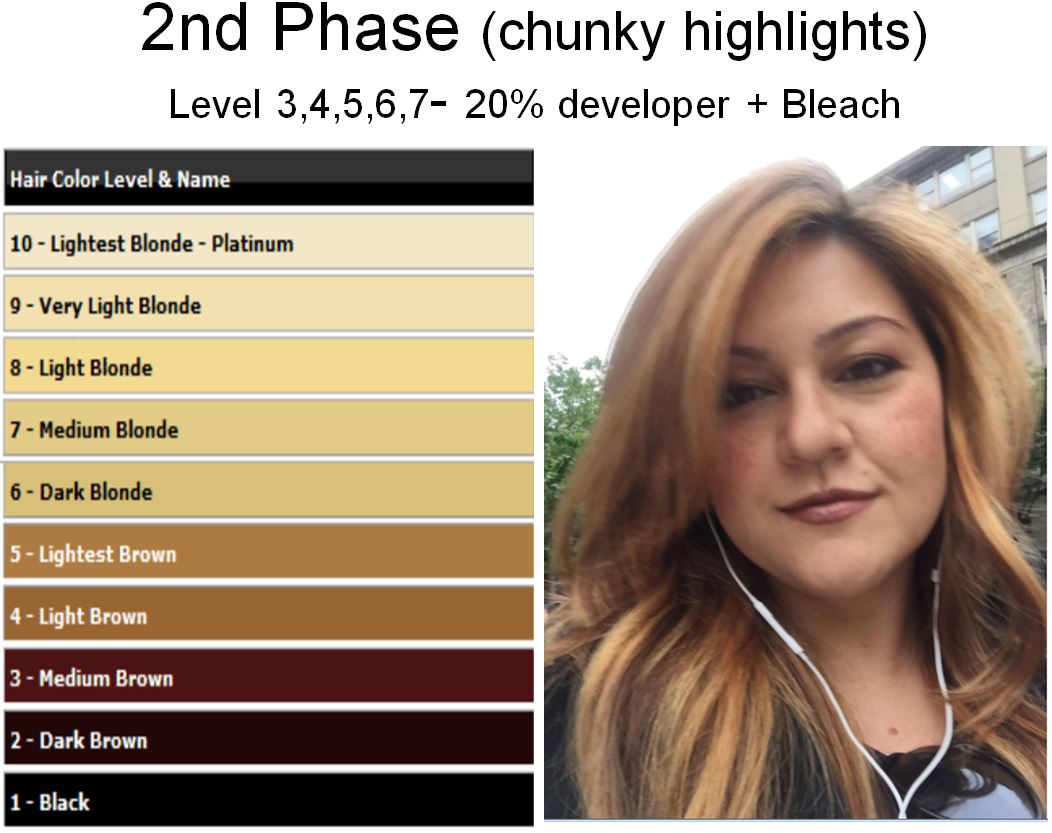
 Products that I have been using for my

"DIY Brunette to Blonde"

"

Where did I buy these?


Sally beauty, I would highly recommend getting a Sally beauty member card for $5 (which you will get back after your registered online) They will send you an email with the $5 coupon, deals, discounts for future purchases. It's a great deal.

What to buy?

Before you buy: read my blog about understanding peroxide/developer and understanding hair color, if you haven't.

1. Peroxide developers -  volume 20 and 30 to start (I like the ion sensitive scalp, it's smells good, it's a little more gentle than other developers)

2. Vaseline or petroleum jelly - this is use to protect the skin around your face from the bleach or color that you are planning to use..color will dye your skin temporarily (e.g., you have seen those women that come out of a salon and there are brown or red dye near their root lines around their faces - that's is because their stylist didn't put anything around their face to protect their skin)

3. Gloves - to protect your hands (also at Sally...I bought a big box as I am planning to do my hair going forward- it's about $20 for a box that will last you years....you can use for cleaning as well and it fits better than those bulky kitchen gloves)

4. Cap - to protect your clothes from the coloring/bleaching process (make sure to get a plastic cap not a cloth as that bleeds through your clothes and will damage it) - around $10 at Sally's 

I would recommend wearing a t-shirt that you don't really care about in case of any mishap, and make sure you do in the bathroom or somewhere with a hard surface (not wood or carpet) or put down an old towel or a garbage bag.

5. Coconut oil - for moisturizing your hair a couple of days or a day before you start (I bought mine form Costco - a big jug that you see in the picture, this is good for multi-purpose, baking, cooking, hair and even for DIY moisturizer or a carrier oil for essential oils) - it was $25 on sale for the big jug, normally maybe $34.99

6.  Loreal Quick blue - bleach, comes in 1lb, 2 pouches inside, will last you a year or two depending how often you work on your hair or others (you can buy this on Amazon as well to deliver directly to your house or Sally) it's $24.99 regular price, $19.99 on sale 

7. A little mix get bowl - that purple one in the picture is $1.59 from Sally, the mixing brush, ranging from really small to big - $.59-$2.99

8. Aluminum foil - already cut into highlighting size - 700 sheets for $11.99 (totally worth it as it was so time consuming trying to cut up my own sheet from the standard kitchen roll--this could be something your kids can help you do if you prefer to do that yourself) - this roll will last for years (I will show you two technique to foiling your hair that i have learned watching stylists over time in another post)

9. Toners - this is more optional depending how light you like your hair or the color you like your blonde hair to be (initially I wanted to see how I would look with an ash blonde so I used a Wella toner T18 - lightest ash blonde) it turned out pretty well but I prefer no toner on my hair (here is a picture of what the toner did to my hair..also you can see my other post to see the phases of my hair transformation.


Saturday, October 24, 2015

Brunette (level 2) to blonde ( level 8) DYI - phase 1-5


 See page 1 for before and after pictures  

Phase 1: you can do this yourself or go get an all over highlighting.  I opted to go with a hair stylist and this was an all over highlight.


If you wanted to highlight yourself, make sure you can find a mirror to use to see the back of your head. I bought a door hanging three way mirror from bed bath and beyond.


I'm testing out how my hair react to these products. Slowly growing my confidence level.


Now I decided, I'm ready to step it up a notch. I did an all over bleach, it turned out a bit more like a dark blonde with some nicer contrast highlights.


Brunette (level 2) to Blonde (level 8) DIY - page 1 of 2

It took me a month to transition from being a level 2 (Dark Brown) to a level 8 (Light blonde).
As mentioned in my other posts, it is important to gradually get to your end result rather than doing it in a big bang.  The rationale behind this is, you want to see how your hair react in order to mitigate any potential hair loss or damage.
My hair is Asian hair, very thick and coarse, can handle a lot and even then, I still take precaution mainly because, my hair did break off when I went to a hair stylist that used a 30 volume developer (I learned this after the fact) on my hair and areas with baby hair (the hair closets to your neck behind your head or hair around your face), those hair actually broke off, I lost about half of my baby or thinner hair in the back of head (and I have very long hair, way pass my bra line) and it broke off and left only about 4 inches from my neck.   At the time, I wasn't very educated about developers or processing time or type / brand of developers so I left it in the hands of a professional and even then, there were still mishap. Again, we are humans, not all stylist are great, just like not all restaurants are good.

With that said, these are the products that I used: (you can see these details in my Products I used post)
  1. Ion Sensitive Scalp, which smells really nice and is gentler on your hair / scalp. 
  2. Quick Blue by L'Oreal
  3. Wella Toner - T18 - lightest ash blonde
  4. Ion 12N - High lift ash blonde (for maintenance)

                                                Phase 0: color treated dark reddish-brown


Final Phase: Before and after

To see all phases and details of products, see this blog -> Brunette to Blonde DIY - all phases!

Wednesday, October 21, 2015

Understanding hair color level for DIY


Above is a color scale / level from the most basic standpoint in that we all know that there are variations of shades for each level.  For example, a level 2 - Dark Brown, could have a blue undertone (reddish brown) or yellow undertone (golden brown). 


Knowing these details, when you go to color your hair or bleach your hair, keep in mind that you may not get the desire result that you may expect.  

 
Box color or bleach from Drug store:


Using a box color or box bleach from a drug store can be a huge savings instead of going to a salon however, there are also drawbacks, what you see on the side of the box - their color scale/level may not necessary be what you will see on yourself, your result may be very different.  What they show you as an approximation based on the assumption that your original color is the same as the picture without taking into accounts your hair type, coarseness, strength, virgin hair or colored hair and undertones.  Additionally, the peroxide/developer in those boxes is unknown to you and may or may not accomplish what you would like it to accomplish.  To understand more about peroxide/developer, see my post about Understanding Peroxide and Developers

 
Doing your own highlighting and coloring using professional products:
 

I was definitely a box amateur colorist for years (so I will not knock box coloring), I have naturally dark brown Asian hair, so super coarse and super thick, however, I hated how the color was always so dull and wanted more of a reddish brown instead of the dull dark brown, so I experimented with box colors and fortunately, I was extremely successful (luckily, I grew up around a mother that does hair for a living, so my confidence level was much higher than the average person with these experiments).  There were box colors that I definitely liked over others, ironically, most of the time, not the ones that are always in commercial either (e.g., Garnier Nutrisse) rather the super cheap ones, like Revlon Colorsilk or Loreal Preference.  Additionally, having Asian hair is also a huge plus; my hair can take a lot of beating and not look like it has been through the ringer.  So with that said, what I did may not work for you unless you have really coarse thick Asian hair.

 
My suggestion for you is to always educate yourself as much as possible before starting.  Coloring your hair with box color may not be ideal for you if your hair is very thin, that is where this blog will help you.  With thin hair, I would suggest getting a cheap box of Revlon Colorsilk (it's ammonia free) and test out a very small section, make sure to set a timer.  From my understanding, developers have a decomposition time after a certain amount of time, it stops working all together.  See chart below:


If you decided you want to start using the professional formula, say to color your hair and not lift, just simply to change to a nicer shade of brown or a nicer shade of blonde, start with a 10 Volume developer and always try it out on a small section of your hair first.  With the professional formula, you can mix a smaller quantity (see the back of your developer for instructions, typically it is a 1 color to 2 developer ratio) or if you are looking to lift your hair to a lighter color, start with a 20 Volume, test out a small section to see the reaction before proceeding to do an entire head.  And again, you can check every 5 minutes to see how your hair reacts, rather than going with the 30 minutes processing time suggested under the Understanding Peroxide and Developers table.  It is always better to be safe than sorry. 


Lifting or bleaching your hair:

If you are to planning to lift your hair to a lighter shade (i.e. bleach) your hair, having thin hair will not require as much processing time, I would suggest checking every 5 minutes to see how your hair handles the bleach.  It is definitely better to gradually go lighter (meaning not in one process or within one day).  Going from a level 2 to level 8 takes about a month for me, I wanted to be safe so I did it in phases and conditioned with coconut oil extensively before starting the process (2-3 days) in between phases to keep my hair healthy.  See my upcoming post for details on each phase and I am planning to create a video soon (targeted for end of October).


Heat effect on coloring and bleaching:

Aluminum foil is often used during highlighting to keep the bleach active, without it, the bleach dries up and stop working.  Additionally, sometimes at salon, they put you under those big hair dryers to help expedite the lifting process.  Below is a picture illustrating the impact of heat on bleach hair using different developers. So this could be something you can do with lower developer to test out on a small section of your hair in an expedited way for faster result. 

This experiment was conducted professionally as part of a cosmetology curriculum that my mom went through. These were done using a standard blow dryer at cool=80 degrees, low=90, medium=100 and high=110.  The color results appear closer at higher heat was used. 


Sunday, October 18, 2015

Understanding peroxide and developers for diy


There are so many peroxide/developers available.

Developer opens up your hair shaft and allows color to deposit however, it can also lift or lighten your hair color at the same time. So that leads to different level of developers.

10 being the lowest level developer with the least damaging and 40/50 are the highest level with the most damaging to the point of breaking your hair off if you are not careful.


What is volume 10 peroxide / developer? 

This is use to open up your hair shaft and allows a color to deposit without any lifting of your own color.  So if you were to dye your hair from lighter to darker, 10 would be perfect. 

What is volume 20 peroxide / developer? 

However, if you are a brunette level 3 trying to dye your hair lighter by one or two shades, 20 volume would be better for you.  Volume 20 will allow your hair to lift one to two levels lighter (see the hair level guide above, level 3 brown with volume 20 developer will take you to either a level 4 brown or level 5 brown, depending on the brand you use and your hair chemistry).

What is volume  30 peroxide / developer? 

Use to lift hair two or three shades or levels (see the chart above). Level 3 brown will take you to Level 5 or Level 6.

 What is volume 40/50 peroxide / developer? 

Is use to lift up to six shades or levels, depending on the brand of developer.  It is the strongest and can be very damaging if you don't know what you are doing.  However, unless you are a professional, I would not suggest trying to lift your hair in one process.  It is safer to use a lower level developer to gradually lift to a desire level over a period of a month, if you have Dark Brown hair like mine. I only use 40 with a high lift for maintenance and only leave in my hair for 10-15 minutes.

I use the Ion Sensitive Scalp developer from Sally Beauty.

I will be doing a video blog to show all the phases I did to take my hair from Dark Brown to Level 8 Blonde with Level 9 & 10 highlights.